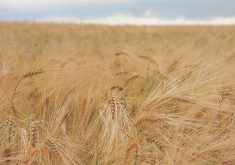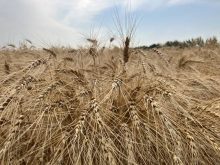


Organic crop farmers may be missing out on a valuable source of data by not sampling and testing their soil for nutrients.
Long a staple of conventional farming operations, soil testing hasn’t caught on to the same degree among organic producers, said a research technician with the University of Manitoba. Although conventional crop producers may have a different use for the outcomes, organic producers can also benefit.
“The sampling is the same. The reason is also the same — to know what the nutrient levels are,” wrote Sarah Wilcott in an email.
Read Also

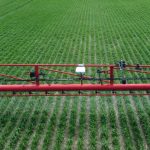
Lower canola seeding rates can cut costs without sacrificing yield, Bourgault trials show
Bourgault strip trials suggest Prairie farmers can reduce canola seeding rates without significant yield loss, though weather plays a key role.
“The only difference is that the conventional farmer will use the fertilizer recommendation that comes with the soil analysis and organic farmers have fewer options to add nutrients.”
Sampling and testing come with another major benefit: the ability to benchmark. Wilcott spoke on the benefits of benchmarking in an organic context at SaskOrganics’ Advancing Organics conference and trade show March 26 in Saskatoon.
WHY IT MATTERS: Organic producers farm differently than conventional growers and don’t always have the same tools, but that doesn’t mean they can’t benefit from knowing exactly what nutrients are available in their soils.
Basically, soil benchmarking means taking a set of samples with a goal of establishing nutrient baselines, at least in this case.
“Typically, it’s (done at the) beginning of a study or a management change and so you want to be able to track the changes that are happening based on that,” said Wilcott, whose expertise is informed by her experience with the Glenlea long-term rotation — the longest organic field crop study in Canada — as well as a soil benchmarking project with the federal Prairie Organic Development Fund (PODF).
“We can then use that information to set soil health goals or fertility goals and then we are able to quantify the impact of our management decisions based on the goals that we’ve set.”
Starts with nitrogen
The most important soil test is for the nutrient status of your soil, said Wilcott. Nitrogen — because of its outsized contribution to plant growth and crop yield — is the most crucial measurement in that test.
Although nitrogen can be sampled at any time, it’s optimal to sample in the fall when the soil temperature is below 10 degrees Celsius. That’s when the highly-mobile nutrient slows down enough to test for an accurate sample, said Wilcott.
“It is more likely that the nutrient levels will be the same in the spring than if you sampled when the soil is still 20 C and there is a lot more microbial activity still going on.”
And if you’re sampling for N anyway, it’s efficient to have the soil tested for other macronutrients — phosphorus, potassium, sulphur and a few others — at the same time, she added.
Name your fields
Wilcott reviewed some best practices for taking soil samples in an organic scenario.
The goal — depending on the size of the area being sampled — is to collect 15 to 20 samples from a field and then combine them together to create one representative sample representative of the entire field, she said. Samples should be taken from depths of zero to 15 centimetres (topsoil) and 15 to 60 cm (subsoil).
“So you’ll have two buckets for each of your depths, and then you go to all your 15 spots, bulk them all together in the buckets, mix it well, and then take a sub-sample from that you will send for soil nutrient (testing).”
How much this final sub-sample should weigh depends on its destination. If you’re sending it for the PODF soil benchmarking study, it will need to be half a kilogram to a kilogram, said Wilcott.
“If you’re sending it straight to the lab, they typically don’t need that much soil,” she said. “So you can talk to them and see how much they actually want you to send.”
You’ll need to find a lab that conducts soil nutrient analysis tests. These are available throughout Western Canada. Google “Soil testing labs in western Canada” for a taste of what’s available.
One way to prevent an inaccurate soil test result is to avoid the edges or any irregular areas of the field. A good sampling strategy is to sample in the shape of a “V” or “W” throughout the field.
“So basically, you’re just going diagonally along your field. It’s a good way to cover the whole field sort of randomly and getting through the cross section of the field.”
Because the data collected is primarily for record-keeping, Wilcott recommended labeling samples and naming fields so producers can understand the data when it’s reviewed at some point in the future.
“A lot of people like to put the GPS coordinates, which is great, but that’s also a very long (string of) number and letters, so it’s nice to have sort of a nickname for your field that’s easy to understand and makes sense to you.”
Producers will also want to include information in their record-keeping such as the dates they sampled and concurrent weather conditions.
“Things like that can be useful, especially when you’re looking back maybe a few years, you’re not going to remember what it was like and it may help you interpret your results.”
If you’re sampling to test the feasibility of a new practice, Wilcott recommended two options.
The first includes setting aside a portion of the field dedicated to the new practice and using the remainder of the field as a control representing your regular practices. The second is based on the same principle, but involves two fields with one acting as a control.
“Ideally, these fields will be as close together or as similar as possible so that you’re sort of comparing apples to apples.”
In either case, you’ll want to sample at least 10 metres from the edge of those fields and leave 30 to 40 metres between samples, she said.
Mind your P and S
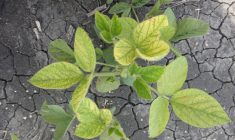
Phosphorus is the second most important soil nutrient for plant growth after nitrogen, said Wilcott, and this is especially the case on organic farms. It can also be a rarity in the soil compared to other nutrients.
“We know that phosphorus is often very low and the lack of suitable phosphorus sources is a challenge, so low phosphorus can impact the plant’s ability to take up nitrogen as well as fixed nitrogen in like legumes,” said Wilcott.
The most effective soil phosphorus tests vary among regions of Canada. For example, the Modified Kelowna method is a good choice for the widest range of soil pH and is particularly recommended for Saskatchewan and Alberta, she said.
The Olsen phosphorus test was developed specifically for higher-pH alkaline soils and in Canada is particularly recommended for use in Manitoba, while the Bray-1 P (P1) test is also suitable for alkaline soils and is typically used in eastern Canada.
Soil P levels are reported as parts per million (ppm), said Wilcott. Organic fields frequently fall short of optimal levels.
“Less than five (ppm of phosphorus) is considered low or very low. The optimum range is 20 to 35 but what we’ve seen on organic farms is that it’s typically below 10 or 15 ppm.”
Wilcott also asked organic producers to be mindful of sulphur deficiencies in their operations. Low and depleted sulphur sulfate levels can follow carbon break-up for planting legumes.
Otherwise, organic producers have historically not had to worry much about S deficiencies in the soil because plenty has been provided by an abundance of organic matter, atmospheric deposition from pollution, and manure application.
But that’s changing, she said. Declining levels of soil organic matter and reduction of pollution — and even improved crop yields — take more S out of the soil every year.